How to Use AI for Video Creation - A Beginner's Guide
A practical, jargon-free guide to making videos with AI tools in 2026 - from your first clip to a polished final cut.
Making a video used to mean buying a camera, learning editing software, and spending hours in post-production. Not anymore. In 2026, you can type a sentence and watch a video appear. You can turn a single photo into a moving scene, or have an AI avatar deliver your script in 40 languages without you ever appearing on camera.
TL;DR
- AI video tools now let anyone create short clips, presentations, or talking-head videos with no prior experience
- The best free starting point is Google Vids, which gives every Google account 10 free Veo 3.1 clips per month
- Good video prompts describe motion, not just appearance - add camera movements and scene action to every prompt
- Takes 30 minutes to make your first video, no account upgrades required
This guide is for people who have never made a video before. No filmmaking background needed. If you've used ChatGPT or Google Docs, you already have the skills to get started.
Two Very Different Kinds of AI Video Tools
Before you pick a tool, it helps to know there are two distinct categories, and they're built for very different goals.
Text-to-video generators take a written description and produce a short clip - usually 5 to 15 seconds. These are best for creative content, social media visuals, product demos, and anything where you want the AI to imagine a visual scene for you. Think of them like AI image generators (if you've tried any of those, check out our AI image generation beginner's guide), but with the added dimension of movement.
Avatar and presenter tools create talking-head videos where a realistic AI person delivers your script. These are used for training materials, product explainers, YouTube videos, and corporate communications. You write the script, choose an avatar, and the tool does the rest.
Both types have free tiers. Both work in a browser. Neither requires a camera, microphone, or editing software.
Text-to-Video: The Main Tools in 2026
Google Veo 3.1 - Best Free Starting Point
If you have a Google account, you already have access to Veo 3.1, currently one of the strongest video generation models available. Google built it into Google Vids, its video creation product at vids.google.com. Every account gets 10 free video generations per month - no credit card, no trial period.
For a deeper look at the model itself, see our Veo 3.1 model profile.
Veo 3.1 produces clips of 4, 6, or 8 seconds. You can choose landscape (16:9) or portrait (9:16) format and resolutions up to 1080p. What sets it apart from competitors is native audio - it can produce synchronized sound effects, ambient noise, and even character dialogue with the video, all from your prompt.
Getting started takes about two minutes. Go to vids.google.com, sign in with your Google account, and look for the AI video generation option. Type your description, select a clip length, and click generate.
Kling 3.0 - Best Value for Regular Use
Kling AI at klingai.com is made by Kuaishou, a major Chinese tech company. Kling 3.0 is their newest model and is widely regarded as best-in-class for realistic human characters and movement. If your videos involve people, Kling often produces results that look less artificially produced than competitors.
You can sign up with a Google account and try it for free. Paid plans start at $6.99 per month for the Standard tier, making it the most affordable serious option in this category. The Pro plan runs $32.56 per month and includes significantly more credits.
Kling 3.0 generates clips up to 15 seconds, with 720p or 1080p resolution. One feature worth knowing about: it supports multi-shot sequences. Instead of producing one continuous scene, you can describe multiple camera cuts in a single prompt and Kling will piece them together. It also generates native audio with dialogue, matching Veo's capability.
Runway Gen-4 - Best for Creative Control
Runway at runwayml.com is the tool that professional filmmakers and creative directors tend to reach for. It's more technical than the other two, but the trade-off is more control over your output.
Runway Gen-4 works a bit differently from Veo and Kling. It's mainly image-to-video, meaning you usually upload a reference image first, then describe how that image should move. This approach produces more consistent visual style across multiple clips - useful if you're building a longer project.
The free plan gives you 125 one-time credits to experiment with. Gen-4 Turbo costs 5 credits per second, so a 10-second clip uses 50 credits. The Standard plan starts at $12 per month and unlocks full Gen-4.5 access, watermark removal, and 4K upscaling.
Which Tool Should You Start With?
| Your goal | Recommended tool |
|---|---|
| Trying AI video for the first time | Google Veo 3.1 (free via Google Vids) |
| Making social clips with realistic people | Kling 3.0 |
| Building a multi-scene creative project | Runway Gen-4 |
| Presenter/training videos without a camera | HeyGen (see below) |
Our best AI video generators roundup goes deeper on pricing and benchmarks if you want a more detailed comparison.
Avatar Videos: HeyGen for Presenter-Style Content
If you want to make a video where a person is speaking - a product explainer, a training module, a YouTube intro - you don't need to appear on camera. HeyGen at heygen.com lets you write a script, pick from a library of 700+ realistic AI avatars, and produce a professional-looking presenter video in minutes.
The free plan allows 3 videos per month. The Creator plan is $29 per month and includes unlimited video creation, 1080p quality, voice cloning (so the avatar can speak in your voice), and support for 175+ languages. That last feature is truly useful for global teams - you write your script once, and HeyGen translates and lip-syncs it automatically.
For a broader look at what's available in this category, our best AI avatar video tools roundup covers the main competitors including Synthesia, which pioneered the space but charges more for fewer minutes per month.
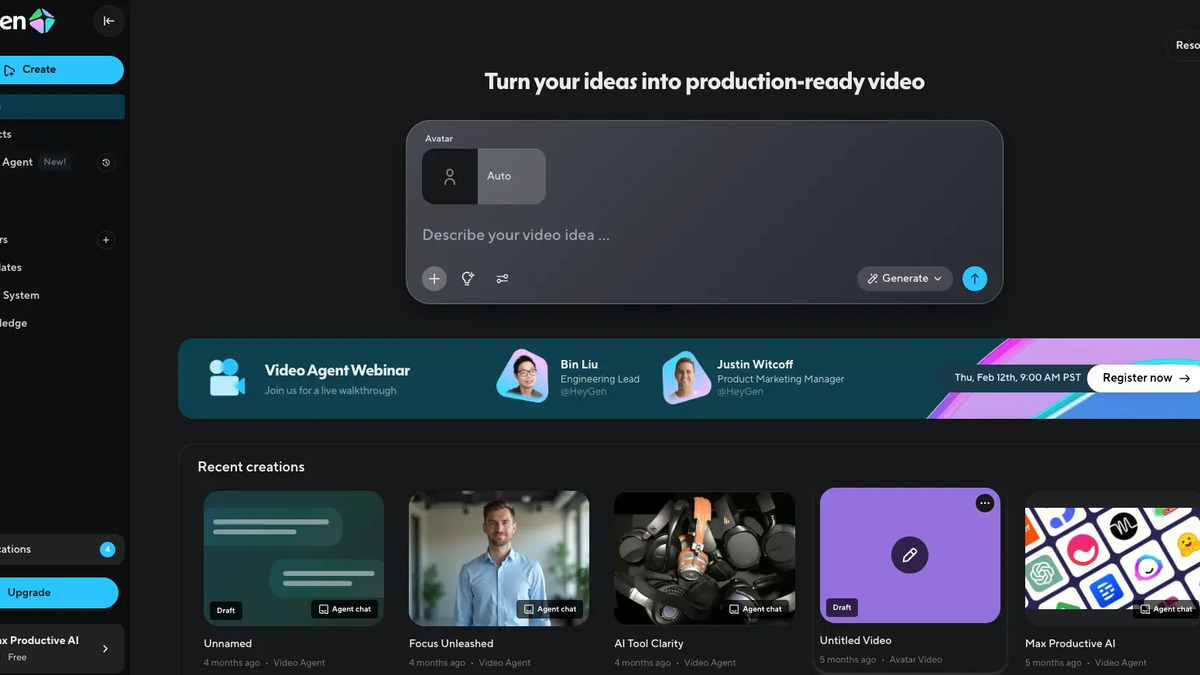 HeyGen's interface lets you pick an avatar and type your script - the AI handles everything else.
Source: heygen.com
HeyGen's interface lets you pick an avatar and type your script - the AI handles everything else.
Source: heygen.com
How to Write a Good Video Prompt
This is where most beginners get stuck. A video prompt is not the same as a photo description. The key difference: video prompts must describe motion, not just appearance.
Vague prompt: "A woman in a coffee shop."
What happens: nothing moves. A static-looking clip that could almost be a photo.
Better prompt: "A woman in her 30s sips a latte at a wooden cafe table while rain falls outside the window. The camera slowly pushes in toward her face. Warm amber lighting, morning mood, realistic style."
The formula that works across most tools is:
- Subject - who or what is in the scene
- Action - what they're doing
- Environment - where the scene takes place
- Camera movement - dolly in, pan left, static shot, crane overhead
- Lighting and mood - golden hour, overcast, studio lighting, dramatic shadows
- Visual style - cinematic, documentary, photorealistic, animation
You don't need all six every time. But skipping action and camera movement is the most common reason a created clip looks flat.
Camera movement terms worth knowing
- Dolly in / dolly out - camera moves closer or further away
- Pan left / pan right - camera swings horizontally
- Tilt up / tilt down - camera swings vertically
- Tracking shot - camera follows the subject
- Static shot - camera doesn't move at all
- Crane / aerial - camera looking down from above
Drop any of these phrases into your prompt and the model will almost always follow the instruction.
Common Mistakes Beginners Make
Asking for too much in one clip. AI video tools do best with simple, focused scenes. If you write "a woman walks into a building, shakes hands with a man, and then they look at blueprints together," you'll probably get a garbled result. Break it into three separate clips and edit them together.
Producing in the wrong aspect ratio. A 16:9 horizontal clip can't be cropped into a 9:16 vertical for TikTok or Instagram Reels without losing most of the frame. Decide where you're publishing before you produce, and set the ratio accordingly.
Using vague descriptors. Words like "nice," "cool," or "interesting" give the model nothing to work with. Replace "nice lighting" with "soft diffused afternoon light through venetian blinds." Specificity produces better results every time.
Expecting long clips to work as well as short ones. Every tool degrades in quality the longer a clip runs. Veo 3.1 maxes out at 8 seconds per generation. Kling and Runway can produce longer clips, but 5-8 seconds tends to be the quality sweet spot. Produce multiple short clips and edit them together rather than pushing for one long generation.
No planning before creating. The most experienced AI video creators spend roughly 5 minutes thinking through each clip before they type the prompt. What's the shot? Where does it start, where does it end? What's the camera doing? That planning reduces wasted generations and credit spend clearly.
 Kling 3.0 supports multi-shot sequences - you can describe multiple camera cuts in a single prompt.
Source: klingai.com
Kling 3.0 supports multi-shot sequences - you can describe multiple camera cuts in a single prompt.
Source: klingai.com
A Simple Workflow for Your First Video
You don't need to master all of this at once. Here's a practical starting point that takes about 30 minutes.
Step 1: Open Google Vids Go to vids.google.com and sign in with your Google account. No payment required.
Step 2: Write three simple prompts Think of a short scene you'd like to see. Write three variations of the prompt - one bare-bones, one with camera movement added, one with lighting and mood added. Produce all three. Compare the results. This teaches you more about prompting than any guide can.
Step 3: Pick the best clip Download the one you like most. Even if none of them are perfect, you'll see concretely what the model responds to.
Step 4: Try Kling for a different style Sign up free at klingai.com and run the same prompts. Notice the differences in how each model interprets the same description. Different models have distinct aesthetics - Kling tends toward photorealism, Veo toward cinematic depth.
Step 5: Edit in any video tool Once you have clips you like, you can stitch them together using CapCut (free, beginner-friendly), iMovie, or DaVinci Resolve (free, professional-grade). Add music, captions, or a voiceover. The AI handles the hard part - creating the footage.
A Note on What AI Video Can't Do Yet
AI video tools are genuinely impressive in 2026. They're also genuinely inconsistent. Faces sometimes distort mid-clip. Text inside a scene is almost always unreadable. Hands still cause problems. Complex physics (pouring liquid, fire, anything involving multiple moving objects) frequently goes wrong.
The tools that work best right now: establishing shots, nature scenes, abstract visuals, simple character moments, and product showcases. The tools that still struggle: fast action sequences, anything with legible text, multi-person conversations, and precise physical interactions.
Knowing the limits before you start saves you from frustration. Set realistic expectations for your first few attempts, and you'll be genuinely surprised by what comes out.
Sources:
✓ Last verified April 21, 2026
